Changelog
Follow up on the latest improvements and updates.
RSS
We're excited to share that our latest update to Neatoscan Collectibles, we've added a new integration with the Automated eCommerce Solutions, LLC Clothing Conveyor. If you use one of these clothing conveyors, you can now seamlessly integrate it with Neatoscan Collectibles.
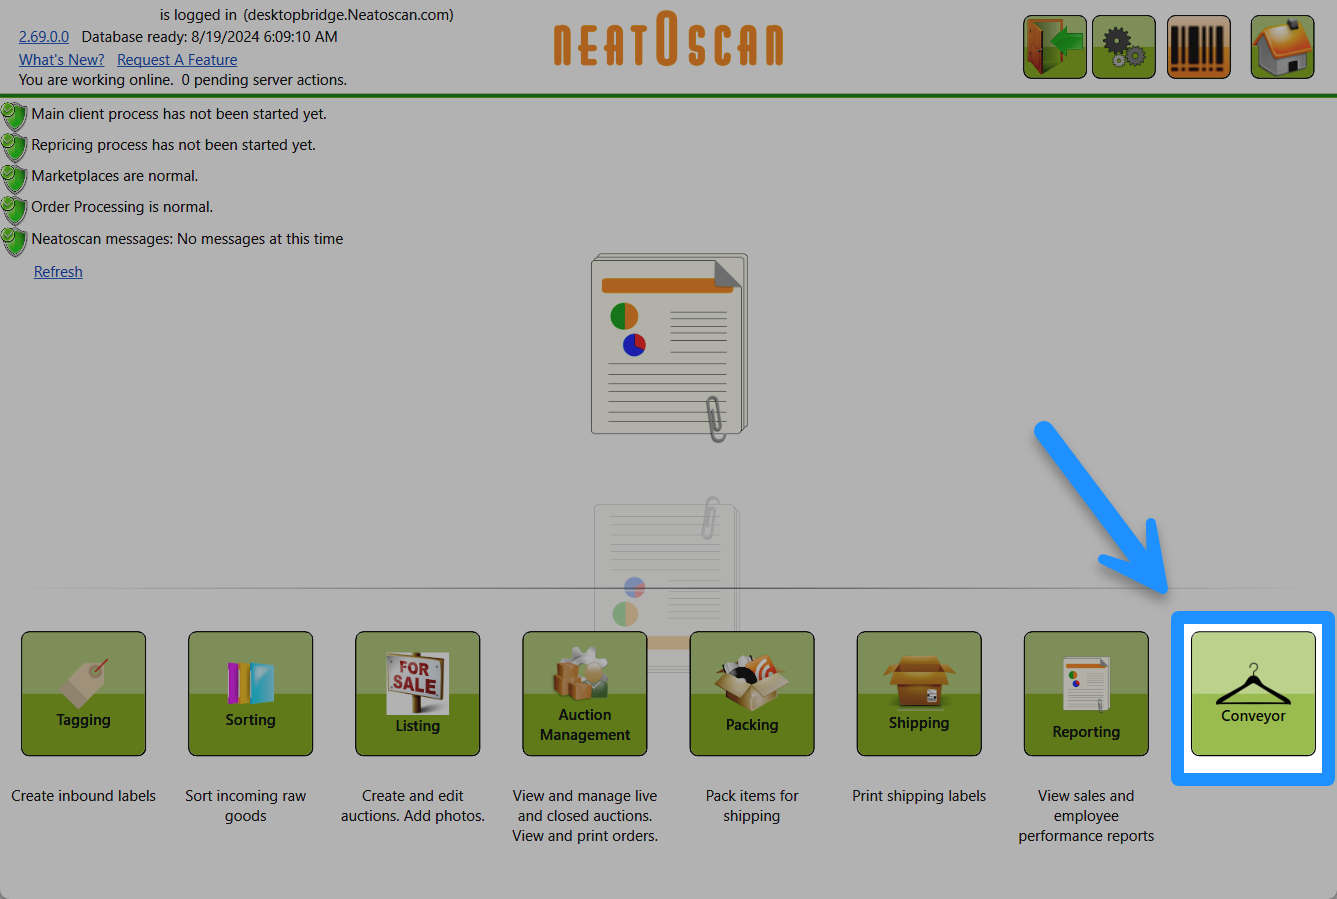
For more details about this solution, please reach out to info@autoecomsolutions.com.
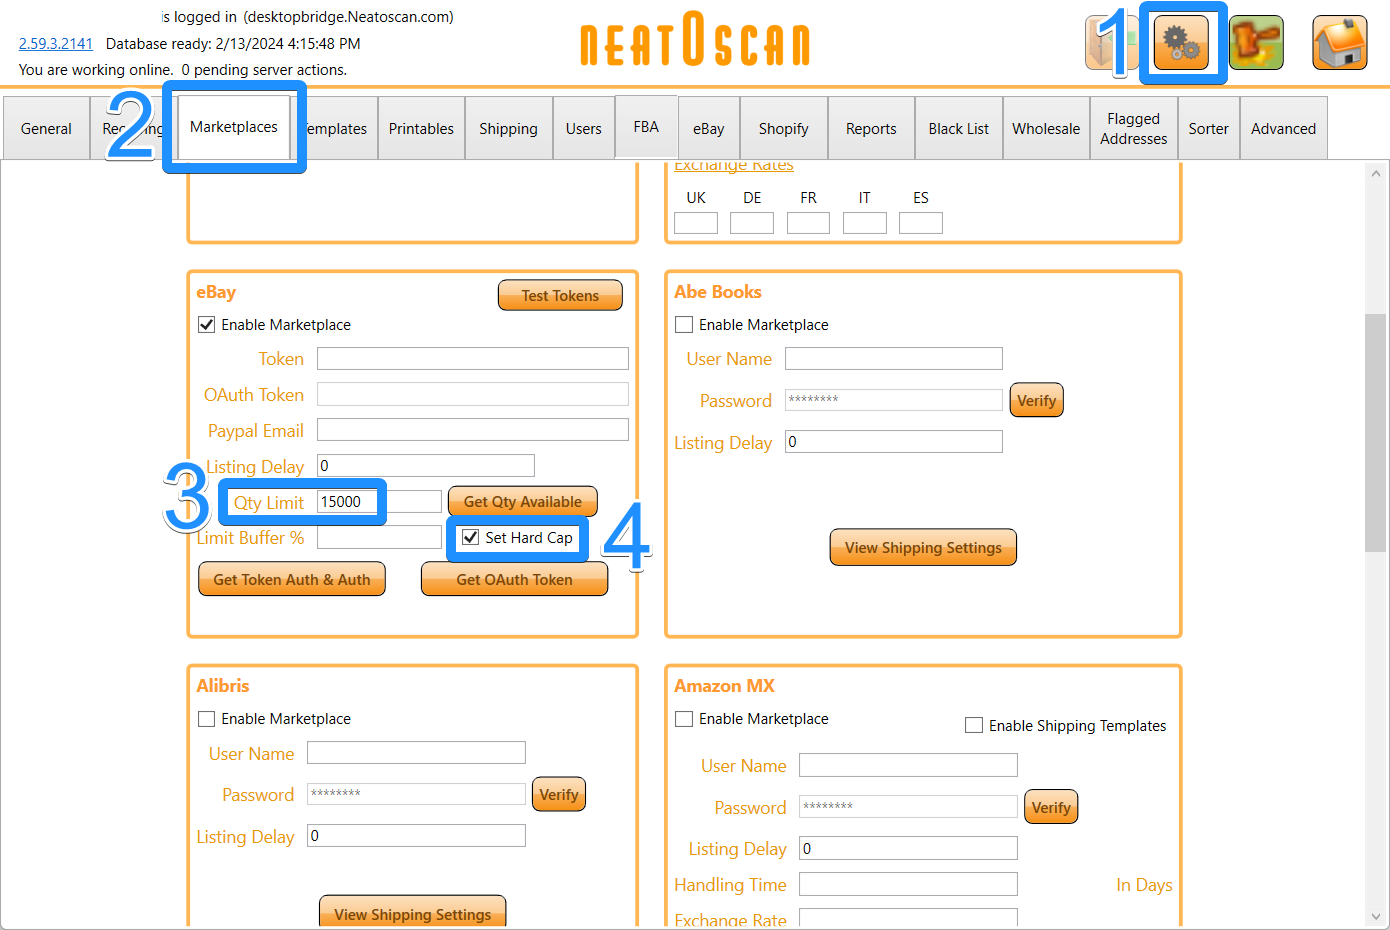
In the past, some users encountered issues when setting a maximum quantity limit for eBay listings in Inventory Manager. At times, the actual quantity listed on eBay would surpass the set limit, leading to added listing fees for the affected users. This was due to the way the quantity limit was calculated.
In the recent update, we have added the "Hard Qty Cap" setting. When this is enabled, the eBay quantity limit is managed based on our records only. This ensures that the maximum number of items on eBay at any given time will be the number you enter into the quantity limit.
- In Inventory Manager, go to the settings.
- Navigate to the Marketplacestab and locate the eBay section.
- Set the Quantity limit you would like to have.
- Check the checkbox for Set Hard Capto enable this feature.
In past versions of Inventory Manager, the collectibles side lacked a direct way to monitor the operational status of its backend process. This lack of monitoring could result in issue detection and resolution taking much longer, potentially impacting efficiency for users.
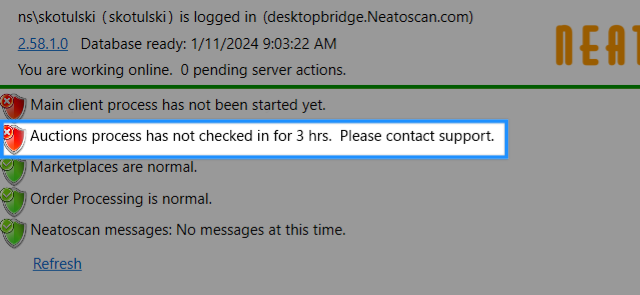
Now, in the latest version of Inventory Manager, the collectibles side no longer suffers from this. This feature will monitor the backends' activity and alert users with a red shield indicator if more than an hour has passed without the backend processing items. This addition helps with timely issue detection and resolution, improving reliability and efficiency in auction management.
What the new shield looks like:
Previously, there was a change to the User Summary report on the Collectibles side that allowed relists to count as Initial Listing records for a product. However, this change was reversed due to complications faced by users who relied on the report for tracking the original listings of items.
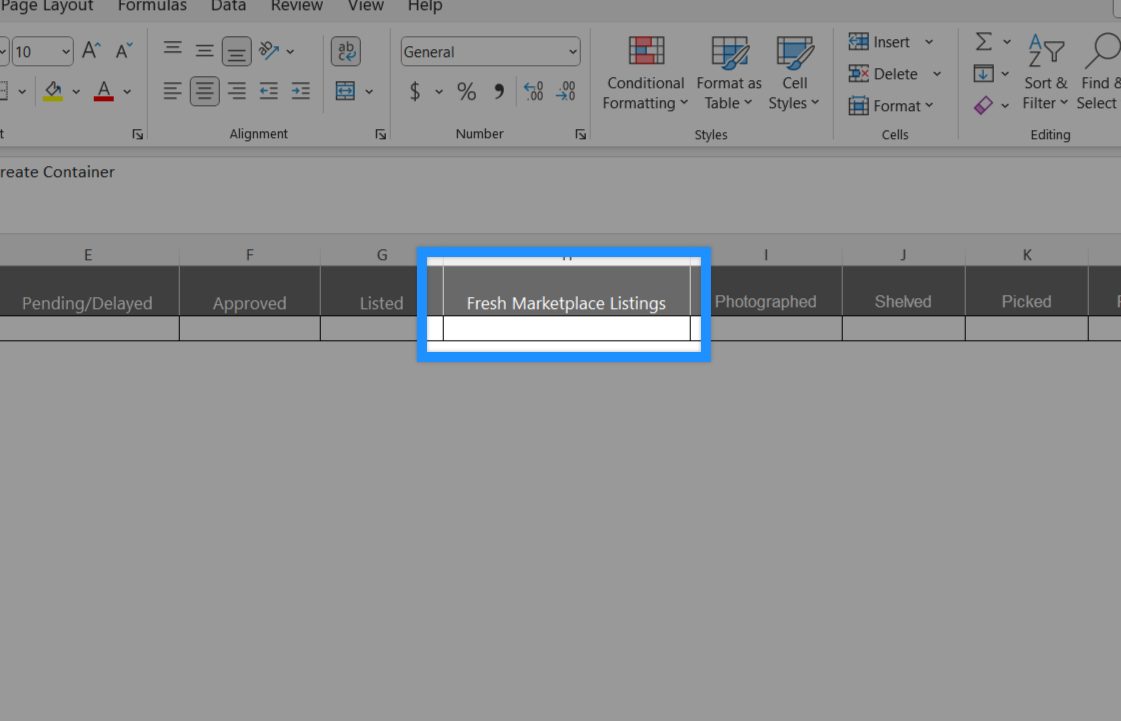
In the recent update, a new "Fresh Marketplace Listings" column has been introduced instead. This column will track the number of times a product is listed or re-listed as a new offering on the marketplace, similar to the functionality of the original change. The image below is what this column looks like on the report.
In previous versions of Inventory Manager, accounts that exclusively listed to Shopgoodwill had to fill in eBay attributes when listing. This was less efficient and slowed down the listing process.
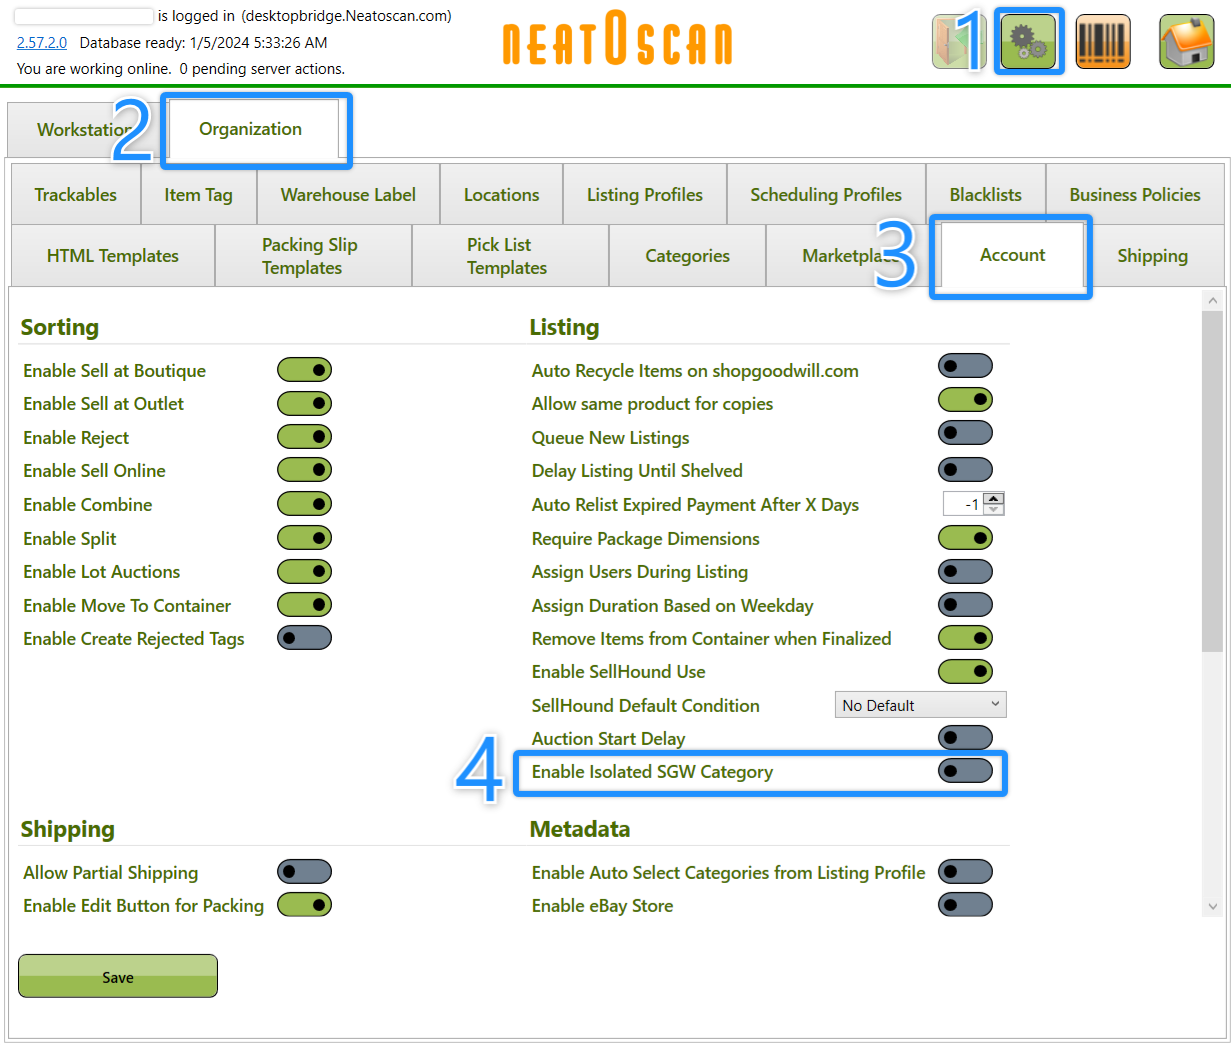
In the latest version of Inventory Manager, there is now a feature that allows accounts to bypass the eBay attributes and categories when listing. This allows users to fill out just Shopgoodwill required information on their listings. To use this feature, listing profiles used must only contain Shopgoodwill.
To enable the "Isolated SGW Category" feature, follow these steps:
- On the Collectibles side, go to settings.
- Select the "Organization" tab.
- Select the "Account" tab.
- Turn the toggle switch onfor "Enable Isolated SGW Category".
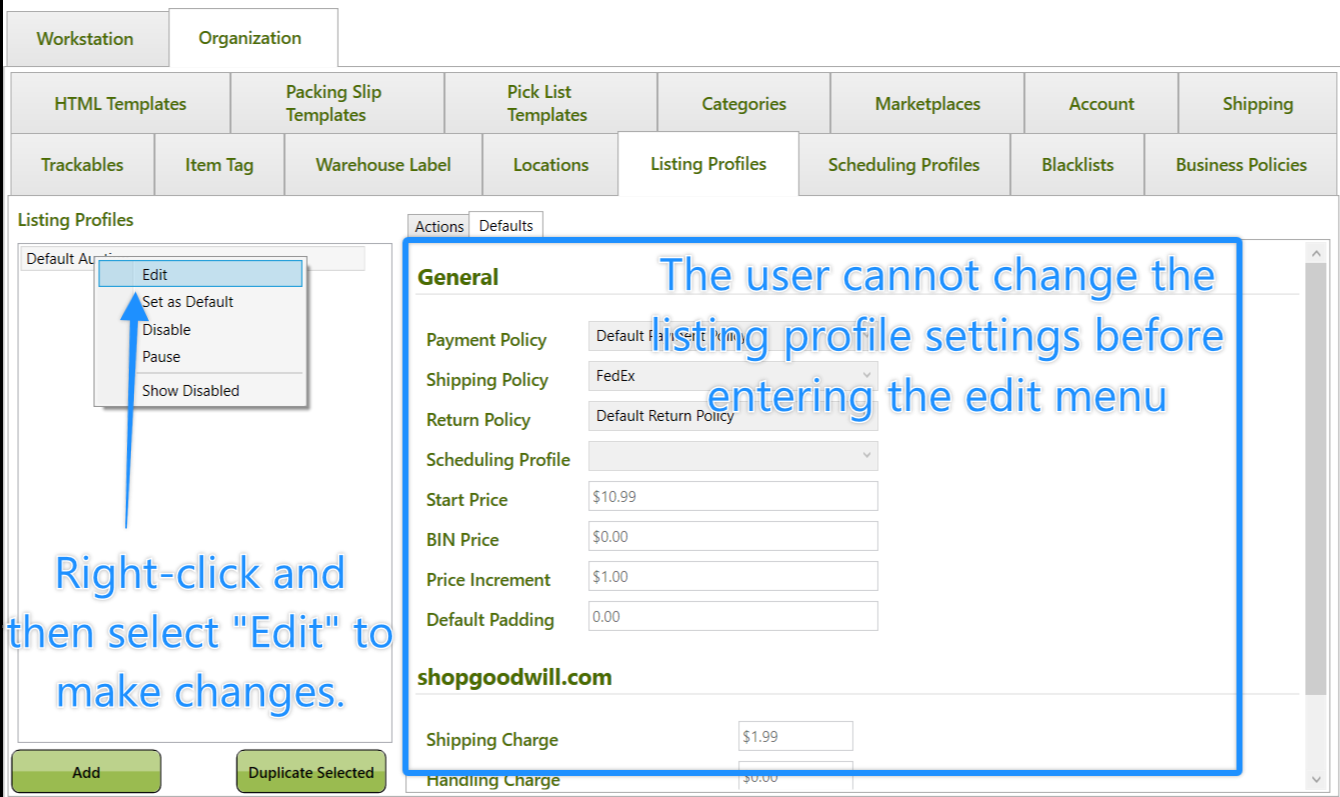
In past versions of Inventory Manager, there was often confusion when editing listing profiles. The UI was misleading, causing users to believe they could edit the listing profiles without first right-clicking on the chosen profile and then selecting "edit".
Now, in the most recent update, the UI has been improved, so the "listing profiles" settings are no longer misleading. Now, in order to update the profile settings, you must first right-click on the profile and then select "edit".
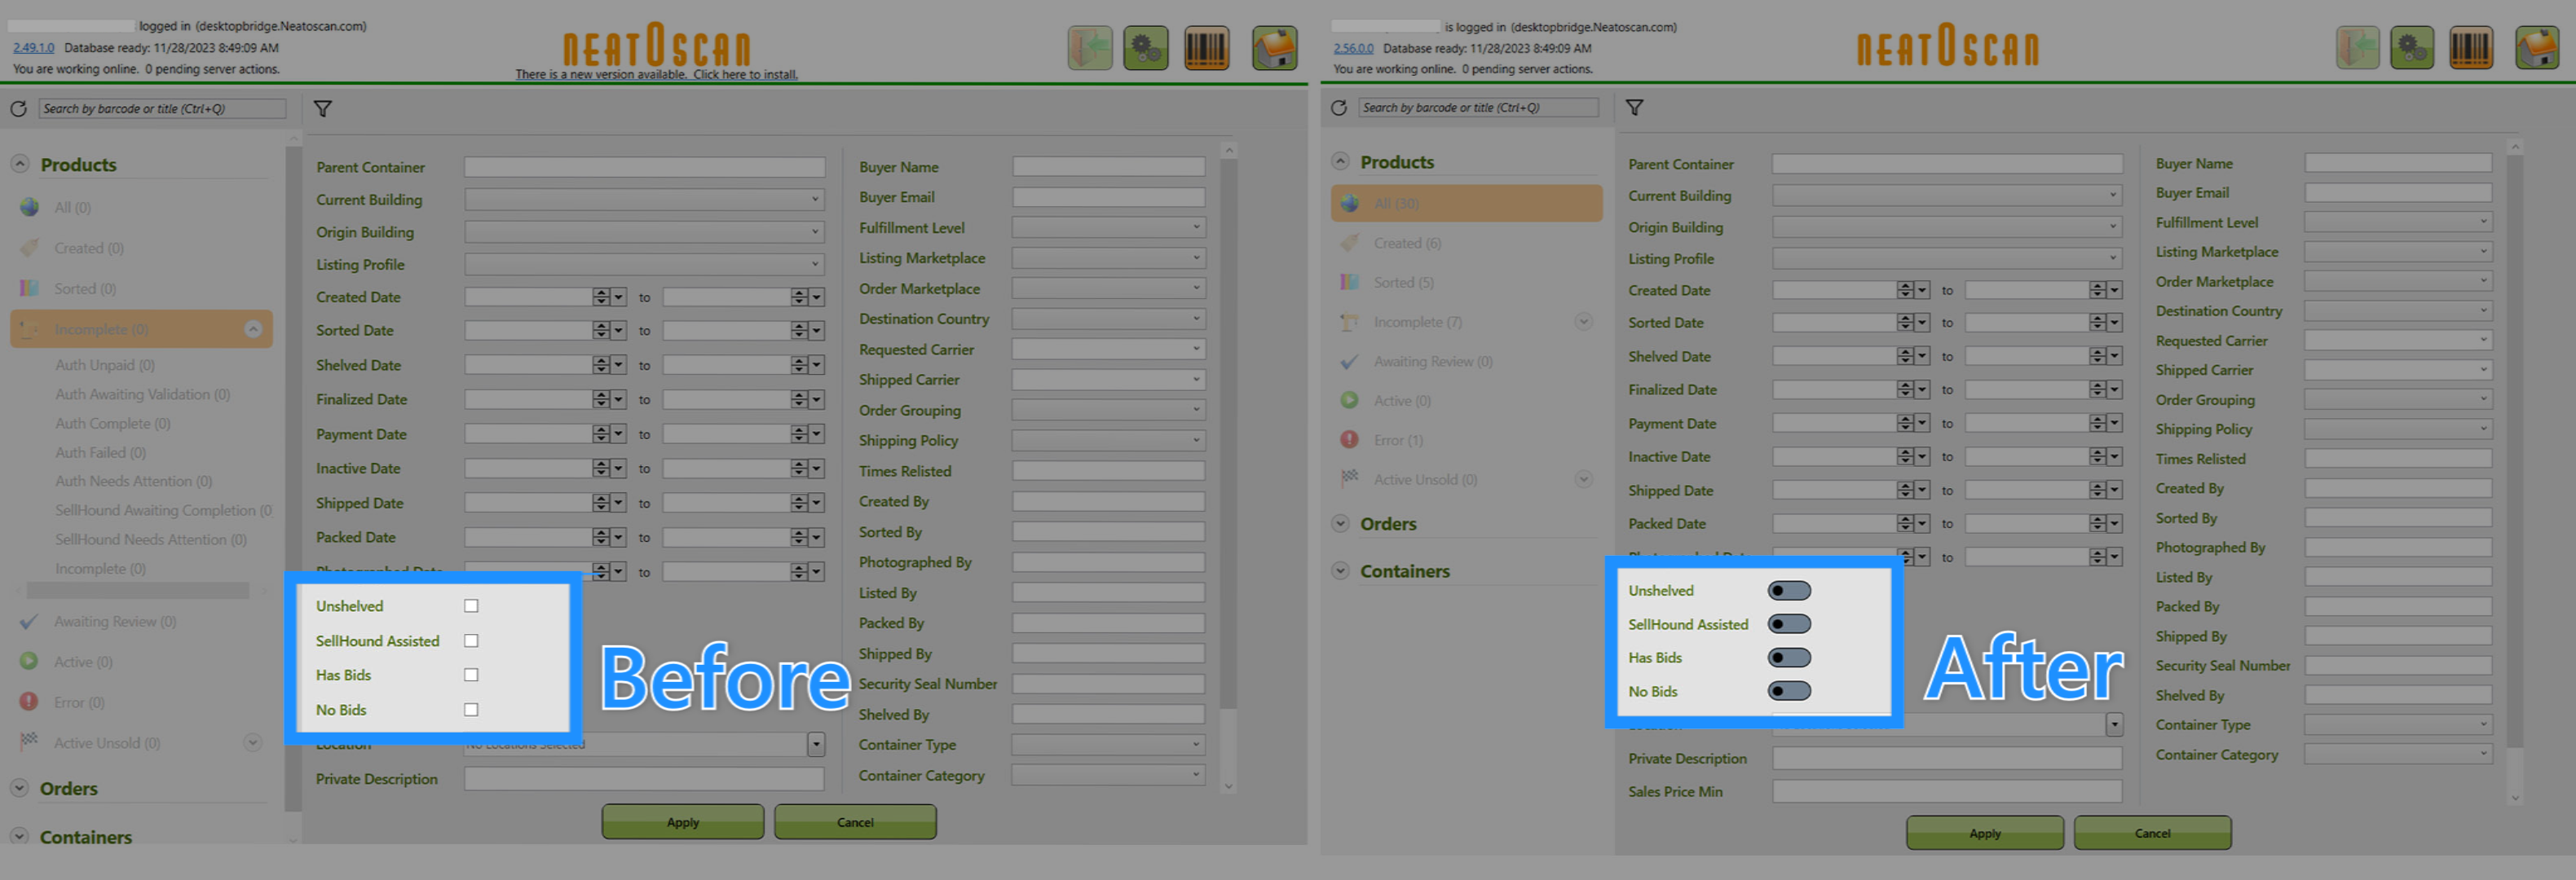
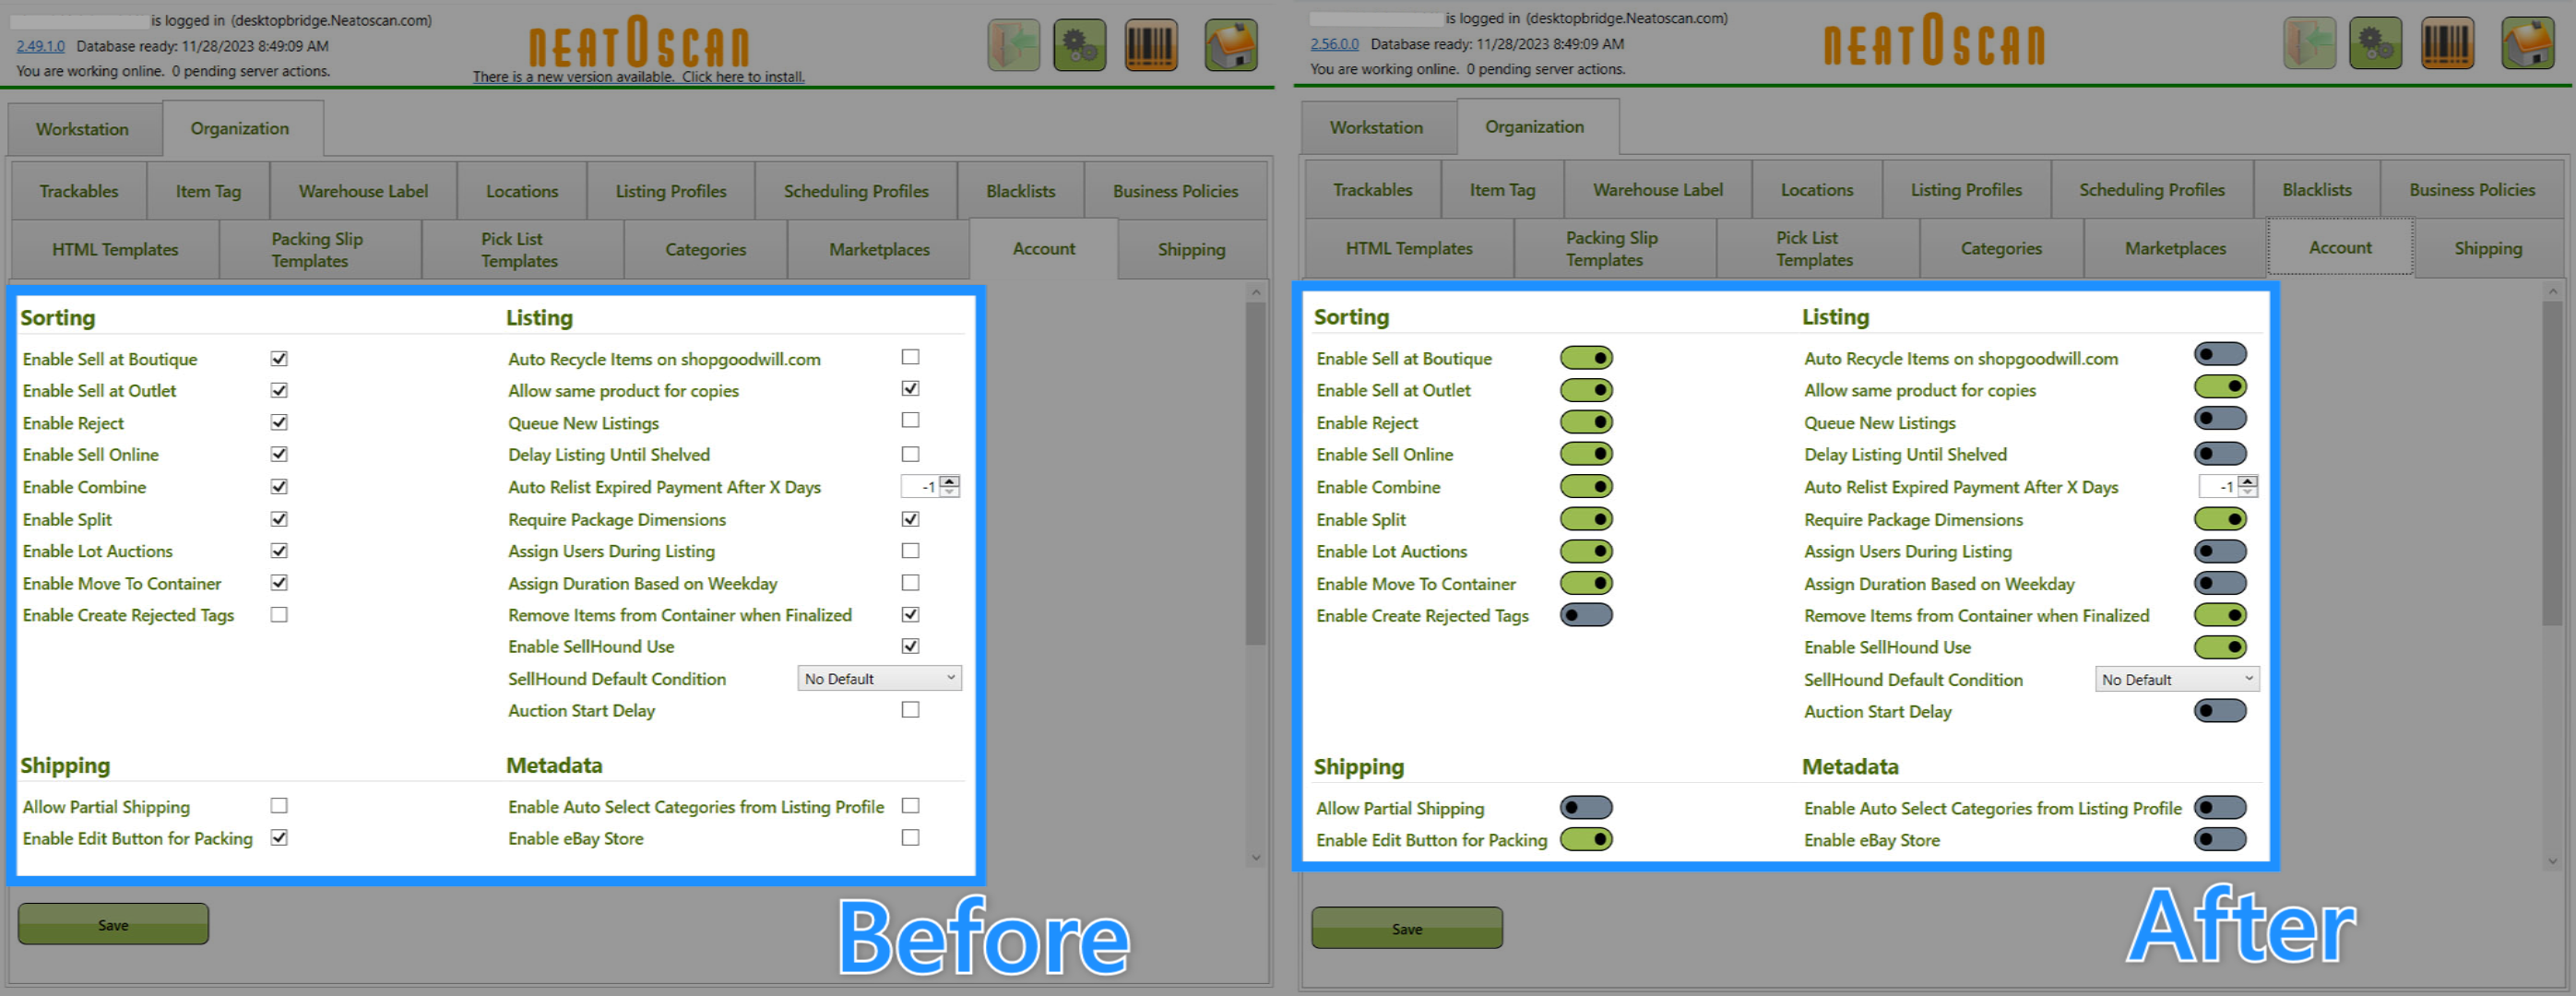
In previous versions on the Auctions side of Inventory Manager, users often faced confusion with the checkboxes in the settings. This could potentially lead to the misunderstanding of a setting or if it's enabled.
In the recent update of Inventory Manager, the checkboxes in search filters and the account settings were updated to toggle switches. This improvement to the UI will reduce the chances that a setting is misunderstood or unintentionally enabled.
Search Filter UI Change:
Account Settings UI Change:
In previous versions of Inventory Manager, if you needed to block a buyer address in the software, there was no way to do so. Additionally, many marketplaces don't allow you to block buyers, which made it very difficult to catch potential fraud.
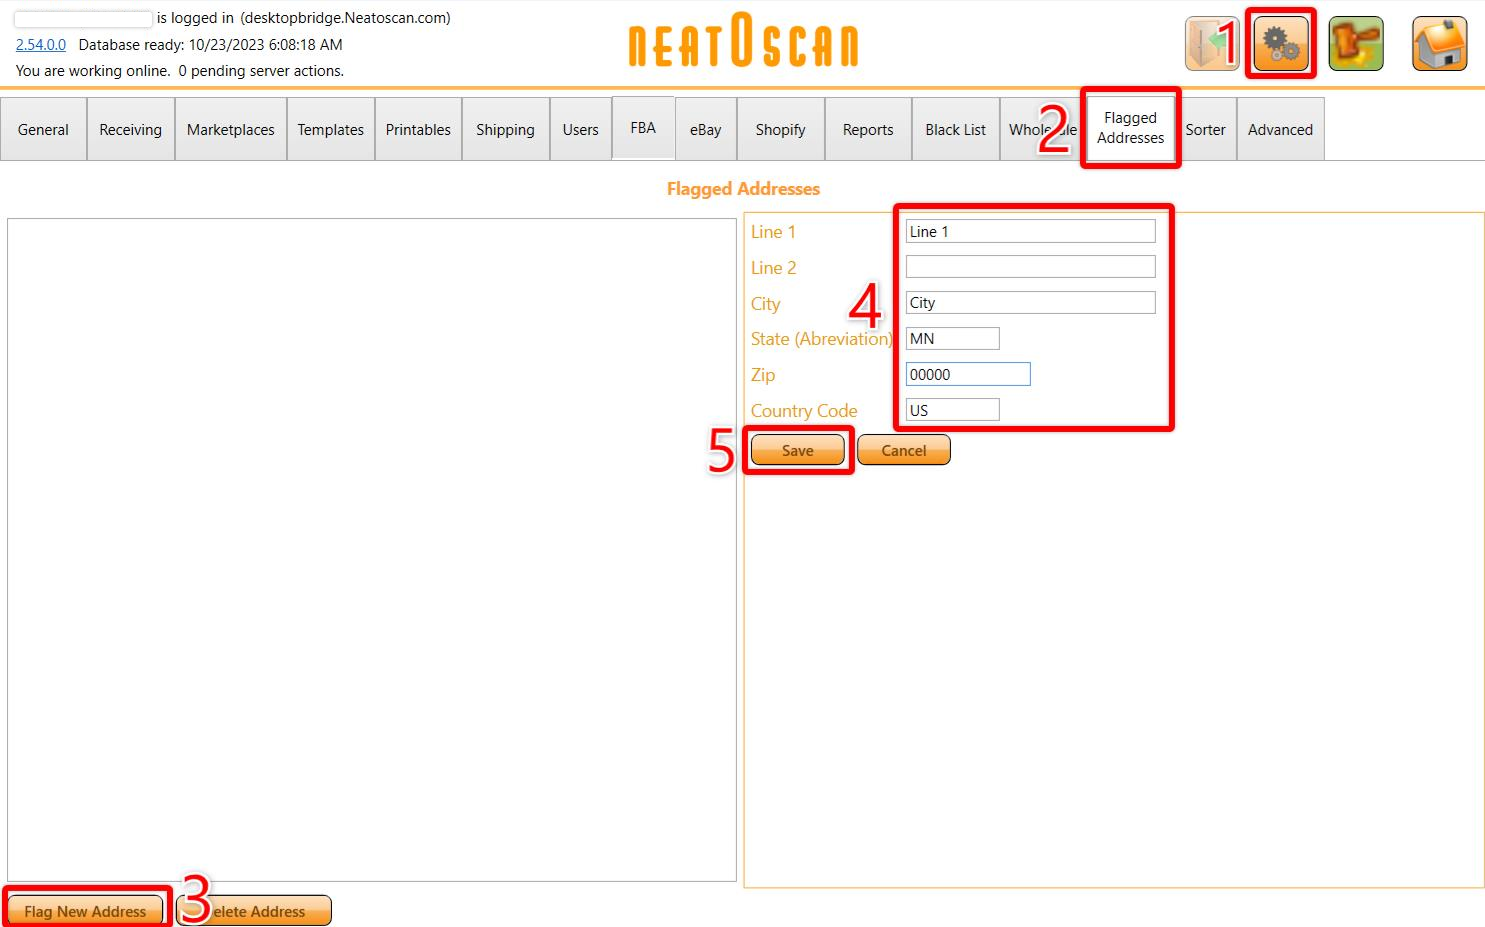
In the latest update we've introduced a new feature which allows you to flag buyer addresses so they go directly to order issues when you receive orders from them. This can help you in keep track of potential buyers whom you have concerns about regarding possible fraudulent activity. In order to use the new "Flagged Addresses" feature, follow the steps below.
- Go to the settings.
- Find the "Flagged Addresses" tab.
- Select "Flag New Address".
- Type in the address you would like flag.
- Click "Save" to finalize the changes.
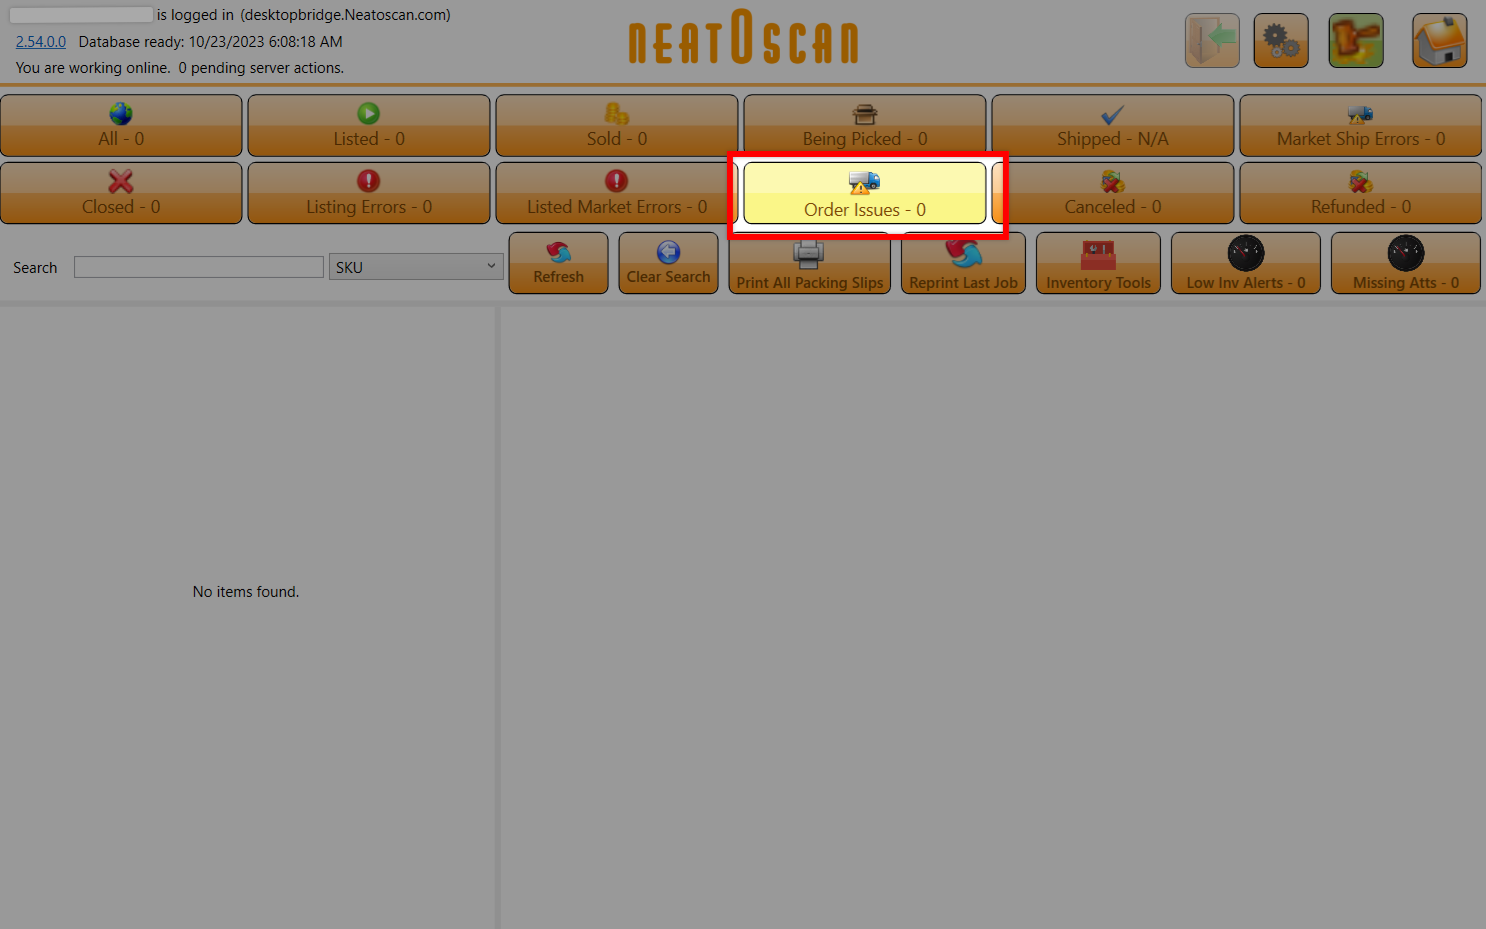
Flagged Address orders will be sent here:
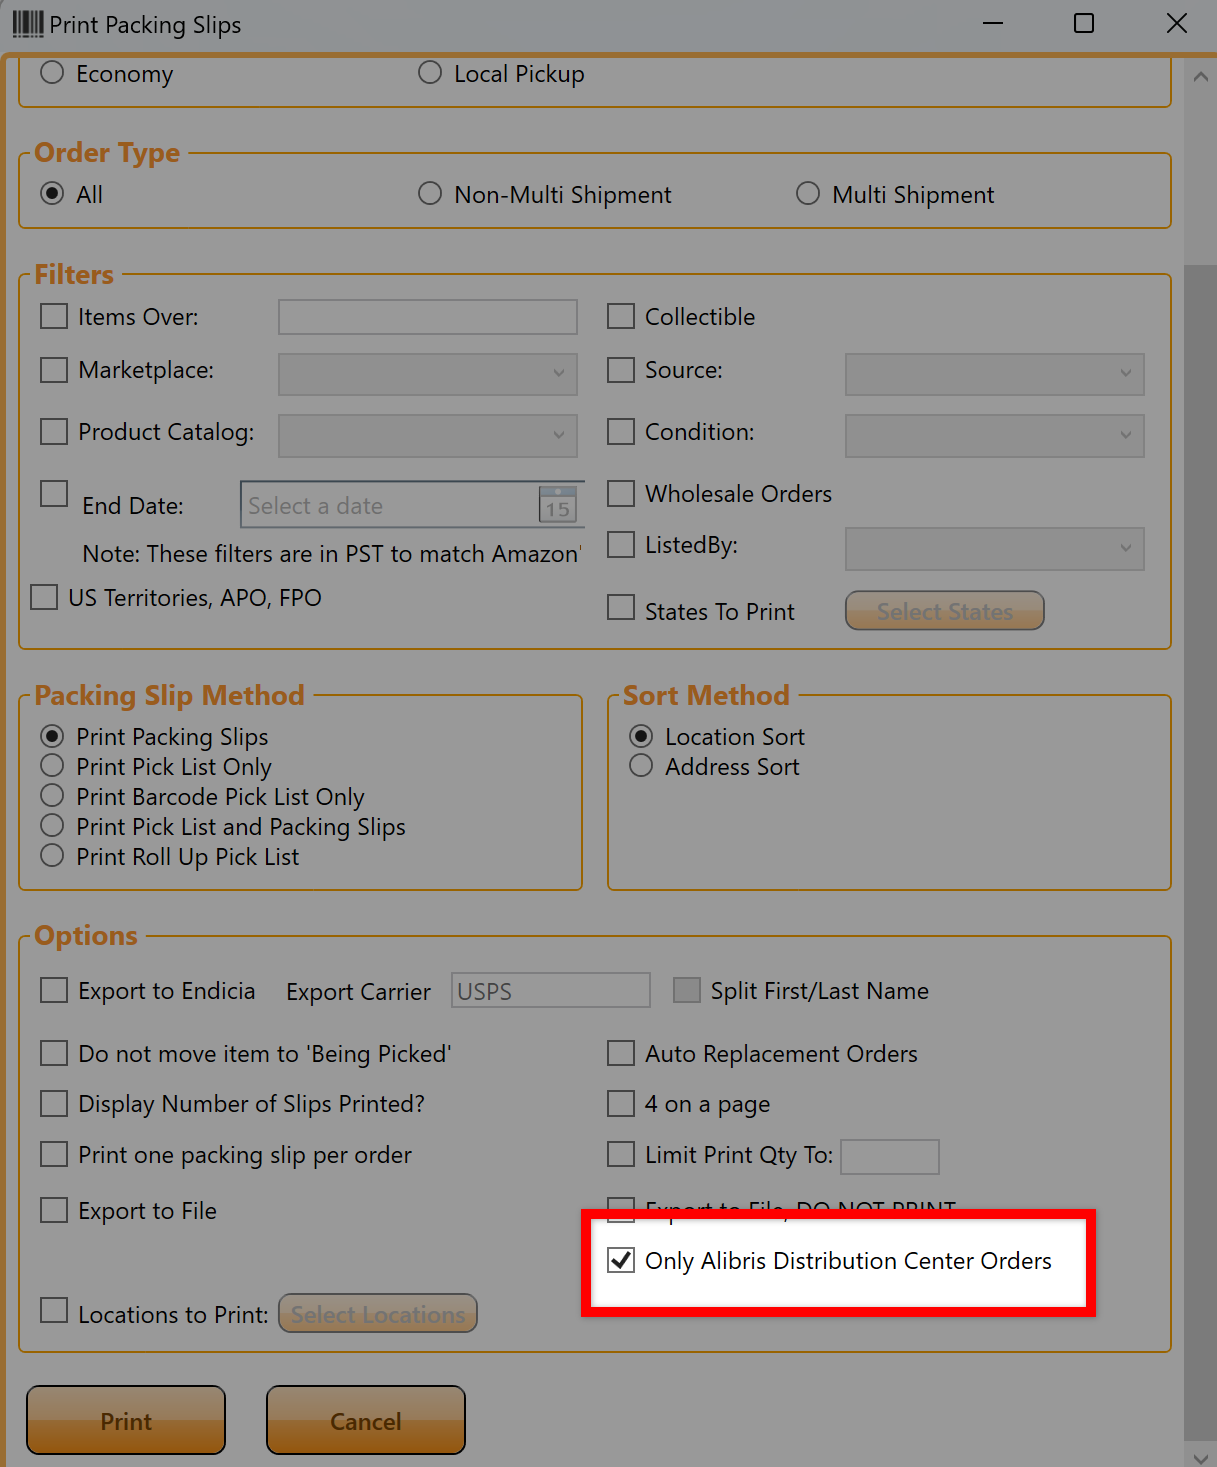
In the previous update, the Alibris Distribution Center packing slip filter was introduced. When choosing "Print All Packing Slips," there was an "Alibris Distribution Center" checkbox. When this was checked, it allowed you to print only Alibris Distribution Center packing slips.
This convenient feature is still available, but the terminology has been updated to "Only Alibris Distribution Center" to avoid confusion. Below is an image of the updated filter.
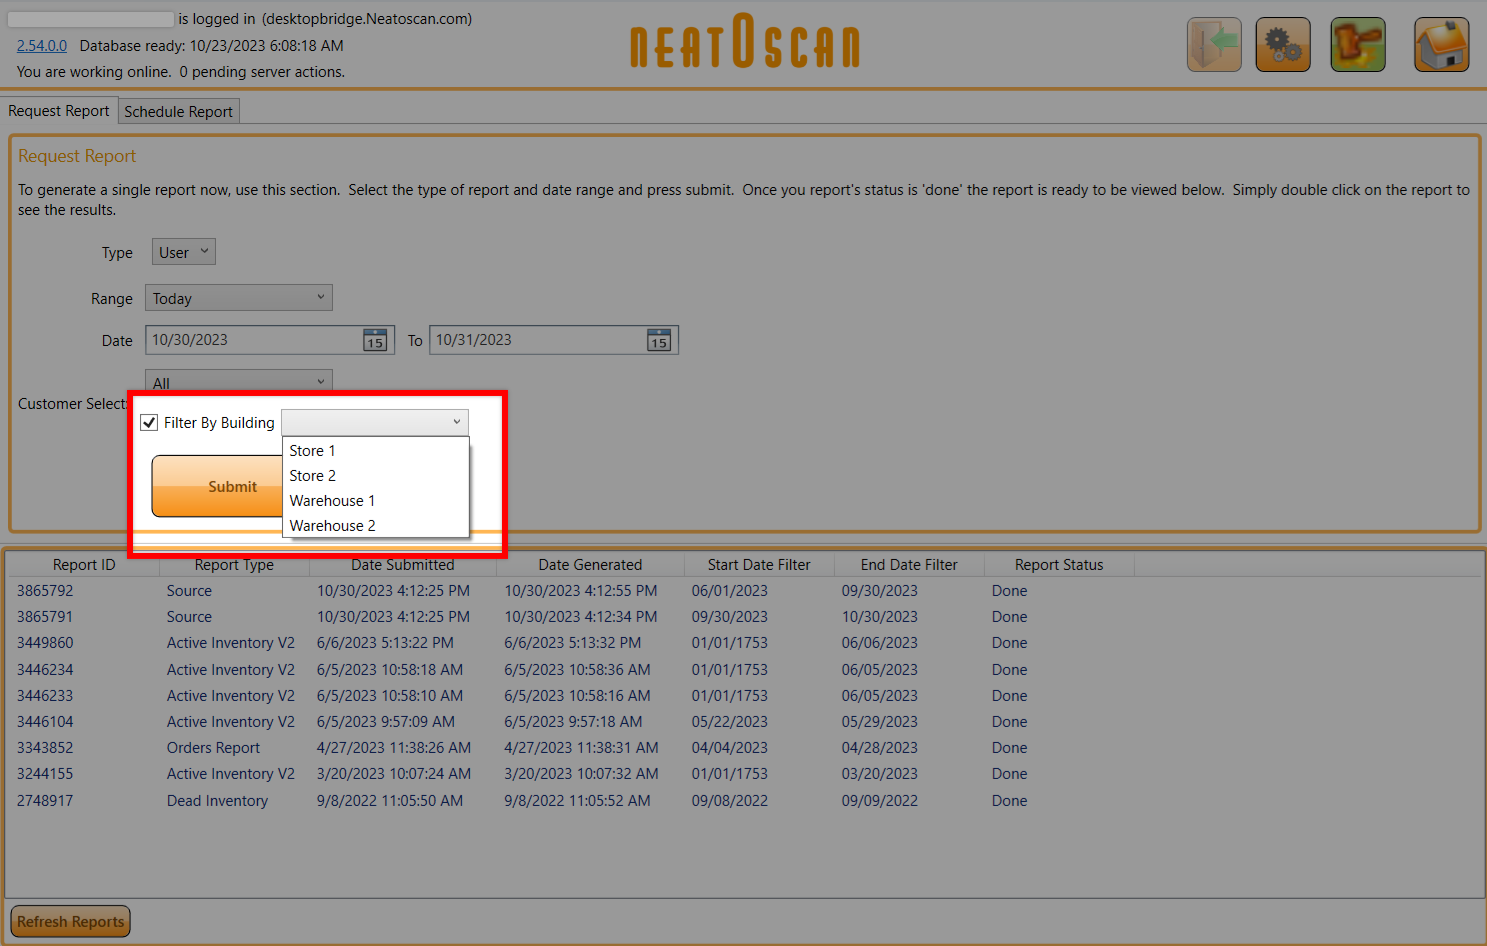
When running "User" and "Scan" reports in the past, there was a Date, Range, and User filter in order to reduce unnecessary data when looking at reports. There was not a way to filter by building though, which would limit some users in the way they could utilize these reports.
In the latest version of Inventory Manager, the building filter was added. This filter allows you to narrow down your "User" and "Scan" reports to the building selected in this filter. This filter is meant for users who use both the Auctions and Books side of the software since there are not multiple buildings you can set on the books side. You can find this new filter in the "Reporting" section of the software when running either report. This is shown in the image below.
Load More
→